Multisim Examples: Quick Functionality Overview Part I
Multisim Software Quick Functionality Overview. Part 1
Task: Multisim software quick functionality overview with examples (Part 1).
Solution:
First start the Multisim program. After program launch you will see the following window:
 Open / Create Schematic
A blank schematic named Circuit 1 is automatically created. To create a new schematic, click on File → New → Schematic Capture. To save the schematic click on File → Save As. To open an existing file, click on File → Open in the toolbar.
Place Components
To place components, click on Place → Components. On the Select Component window, click on Group to select the components needed for the circuit. Click OK to place the component on the schematic.
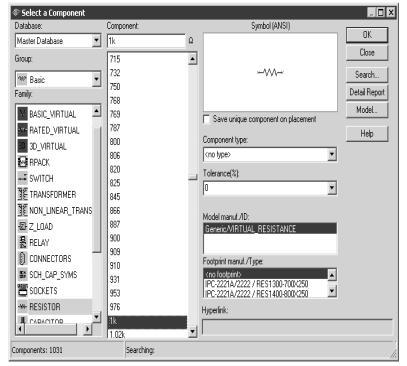 Figure 1: Select Resistor
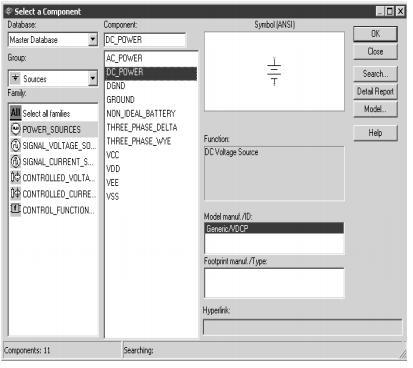 Figure 2: Select DC voltage
Virtual Components
Components can also be placed on the circuit using virtual components. Click on View → Toolbars and select the toolbar needed for the circuit.
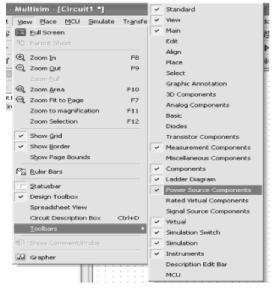 Figure 4: Virtual Components
Rotate Components
To rotate the components right click on the resistor to flip the component 90 clockwise (Ctrl +R) and 90 counterclockwise (Ctrl + Shift + R).
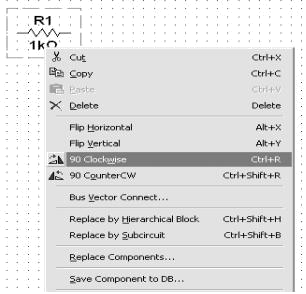 Figure 5: Rotate Components
Place Wire / Connect Components
To connect resistors, click on Place/Wire, and drag and place the wire. Components can also be connected by clicking the mouse over the terminal edge of one component and dragging to the edge of another component.
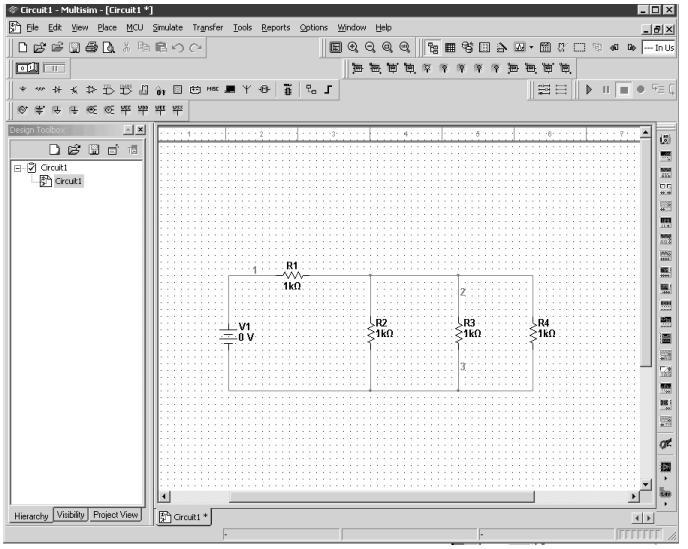 Figure 6: Place / Wire
Read part 2: About Multisim Software: Quick Functionality Overview Part II