
[Tutorial] How to Make a Website Using HTML CSS and JavaScript
To learn how to make a simple html page, we need some text editor, for example, Windows Notepad. But it is more convenient to use a special editor like Sublime Text that has syntax highlighting. And to view html page use any Internet browser. Simply open it by double-clicking.
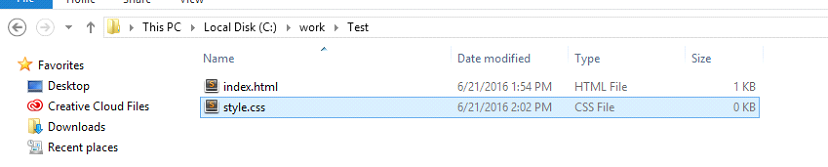
So, let’s create the first page. Create a new folder, call it Test. This folder will contain the files of the site. Now, in the test folder, create a file called index.html.

This file will contain html tags that will describe the basic structure of the site. That is what we will then open in a browser to view the resulting html page. Open the index.html file in a text editor.
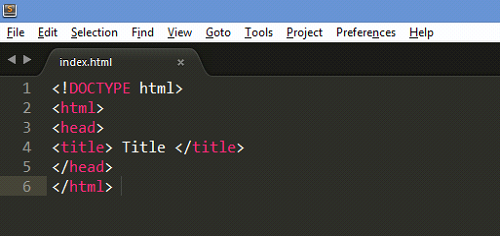
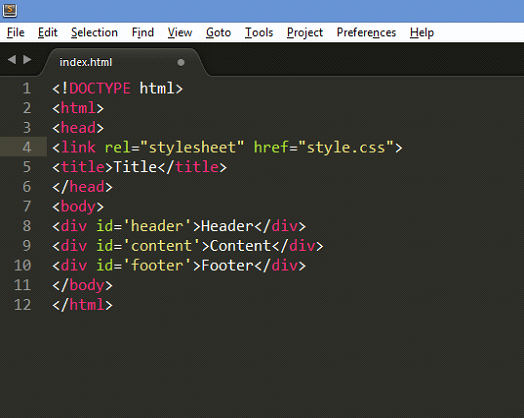
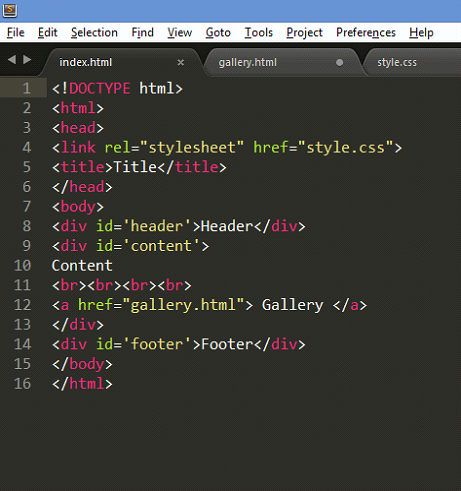
Indicate the type of document using the tag <DOCTYPE!>, In this case, we use html5, so you can write just <DOCTYPE html!> . Next, be sure there is an opening tag <html>, which tells the computer that now he will have to deal with html code. The closing tag </ html> will be at the end, indicating that the html code is completed. The next tag – <head> </head>, which in this case will have a page title that appears in the header of the browser, and in other cases, it will have a meta description, keywords, path to the css scripts and so on. d. Usually, <head>tag is connected with files and scripts needed for the operation of the site. As mentioned above, in the <head> tag let’s write the page title like this: <title> Title </ title>. Title is written inside the <title> tag. Let’s sit back and see what we have at the moment:
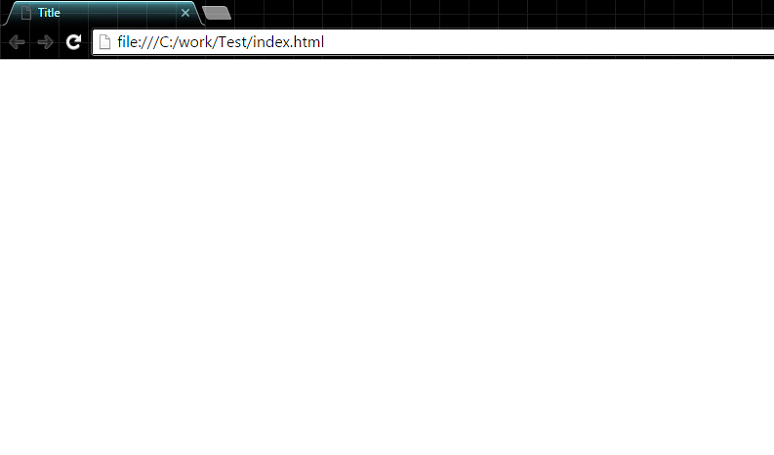
Save the file and open it in a browser. There’s nothing interesting there, but if we take a closer look, we can see that the title of the page is in the header of the browser.
Let us turn to the visible part of the page. It starts with the tag <body>, which is closed after the apparent of the end of page. This is often just before the closing </ html>, here’s an example:
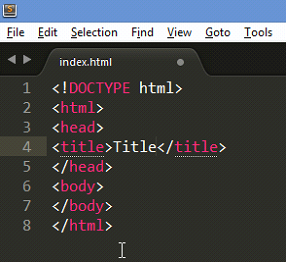
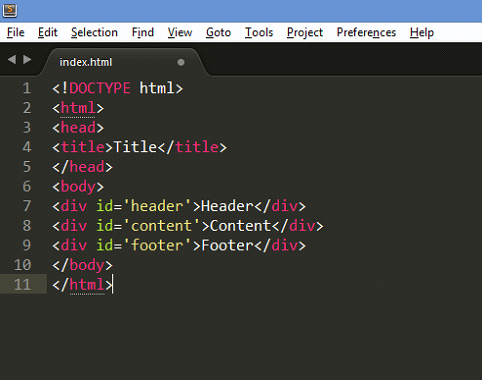
The <body> tag contains the body of the site, it displays all the visible elements such as header, content, footer and much more. We proceed to the layout of the site. Now we will use the <div> tags, that allow us to distinguis blocks and sections in html page structure. Operating with <div> tags, you can assign them with an id, which will allows better orientation in the structure of the page, and the use of cascading style sheets in future. Id tag has the following syntax: <div id = ‘name’> and a closing tag like this: </ div>.
Our page has the simplest structure: header, content block, and footer. The header is usually placed at the top of the site and has such elements like name, logo, company address, etc. Content block displays various information; footer is the lowest part of the site, there can be a simple picture, current date or any other information. So let’s add a new
<div> tags to the index.html file:

Save the index.html file and look at the result:
Now let’s consider the use of Cascading Style Sheets, abbreviated CSS. The main purpose is to separate the external css page design and its structure, so css will be included as a separate file.
Create a new file called style.css in the Test folder.
Connection of the css-file occurs in the section <head> </ head>. Just write the following between the <head> tags: <link rel=”stylesheet” href=”style.css”>:
And let’s fill the style.css file with styles:
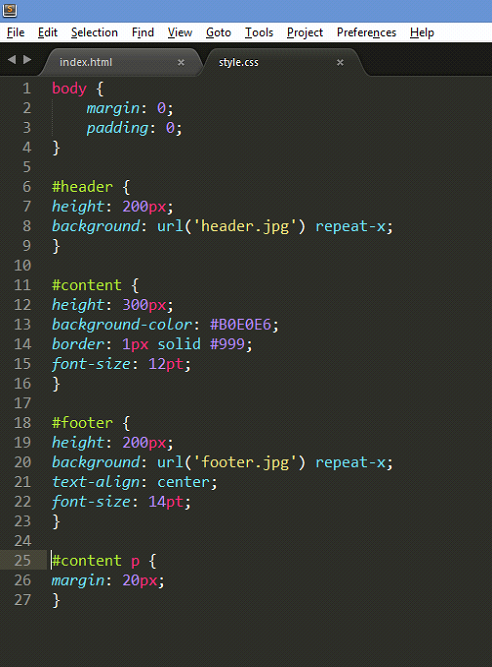
CSS syntax is simple – the first is the html-tag name for which the style is described, and then directly the visual style in the braces, always with a semicolon at the end of each property. Global tags such as body, html should be written without any signs, if we describe an item that was recorded as <div id = ‘…’>, it will be the octothorpe (#) at the beginning, if <div class = ‘.. . ‘> it should be a point (.).
Save the style.css file, refresh the page in the browser, and if everything was done correctly, you will see the following:
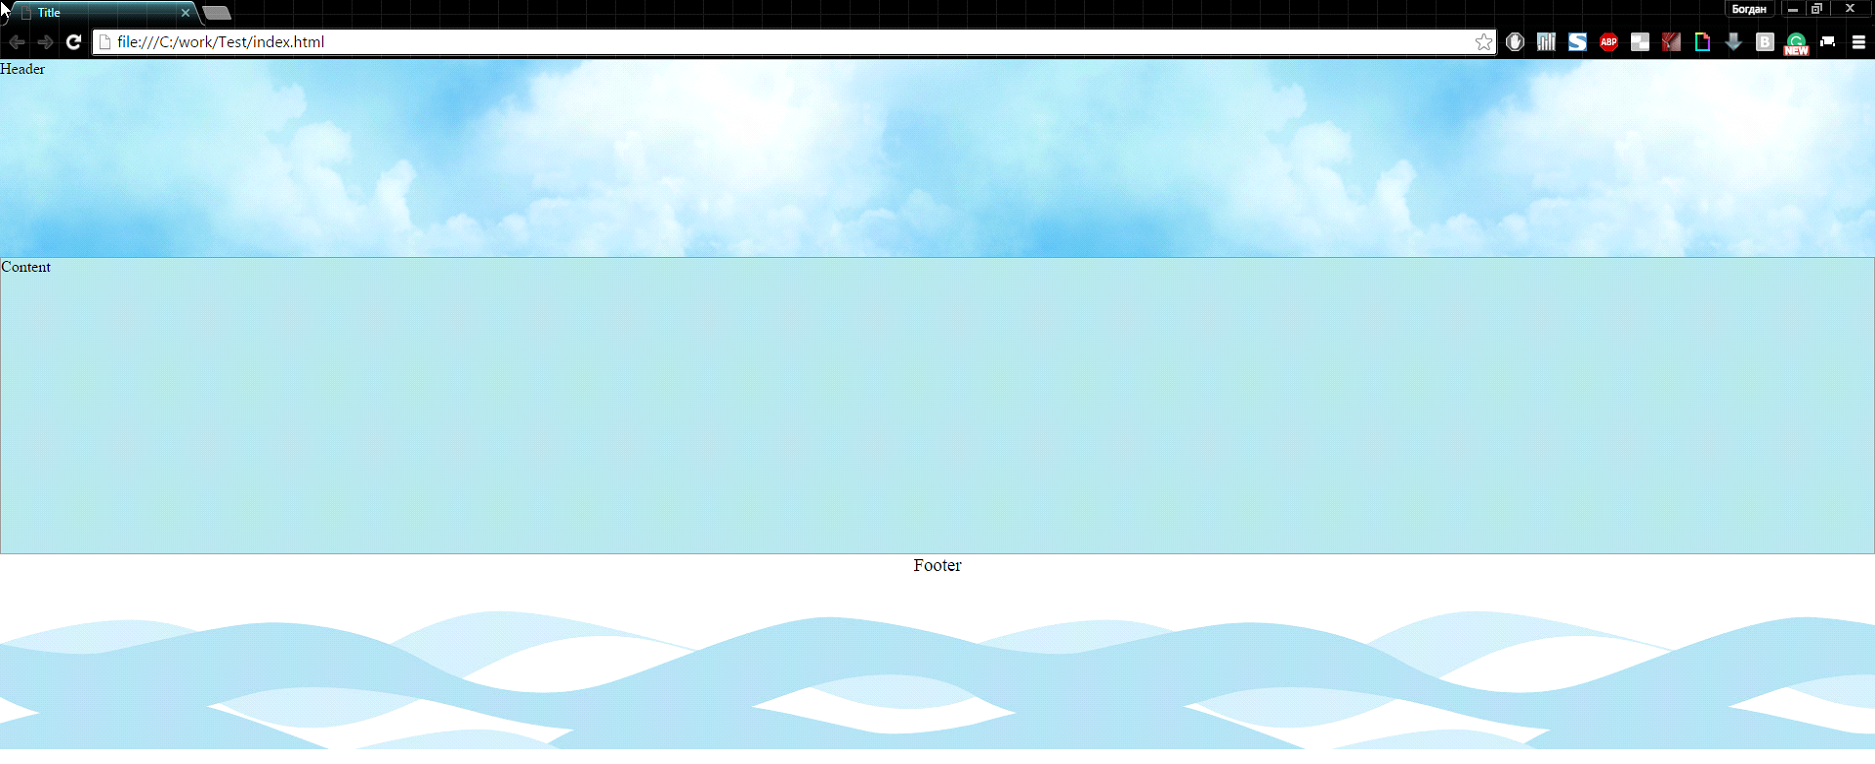
Of course, the page looks very simple, and its structure is primitive, but it may already be a page of a site as it has everything you need for this.
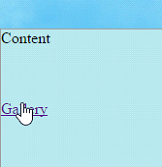
Now, let’s make a gallery based on javascript. Create a gallery.html file in the Test folder and add the link to the gallery to the Content block:
Now let’s fill the gallery html with such code:
|
1
2
3
4
5
6
7
8
9
10
11
12
13
14
15
16
17
18
19
20
21
22
23
24
25
26
27
28
29
30
31
32
33
34
35
36
37
38
39
40
41
42
43
44
45
46
47
48
49
50
51
52
53
54
55
56
57
58
59
60
61
62
63
64
65
66
67
68
69
70
71
72
73
74
75
76
77
78
79
80
81
82
83
84
85
86
87
88
89
90
91
92
93
94
95
|
<!DOCTYPE html><html><head><link rel="stylesheet" href="style.css"><title>Gallery</title><style type="text/css"></style></head><body> <div onMouseOver="btn_show()" onMouseOut="btn_noshow()" class="wrapper"> <script type="text/javascript"> //array with links to images var imageArray = [ "1.jpg", "2.jpg", "3.jpg", "4.jpg", "5.jpg", "6.jpg", "7.jpg", "8.jpg", "9.jpg", "10.jpg", ]; window.number = '0'; //amount of pictures = length of the array var imageCount = imageArray.length; function image(num){ //if the next pic is chosen if(num == 1){ //if it's the last picture the counter won't be increased if(number < imageCount - 1){ number++; document.getElementById('images').src = imageArray[number]; document.getElementById('num_img').innerHTML= number + 1 + '/' + imageCount; } } else{ //if the previous pic is chosen //if it's the first picture the counter "number" won't be increased if(number > 0){ number--; document.getElementById('images').src = imageArray[number]; document.getElementById('num_img').innerHTML= number + 1 + '/' + imageCount; } } } //function for showing the buttons function btn_show(){ if(number != 0) document.getElementById('left').style.display='block'; if(number != imageCount - 1) document.getElementById('right').style.display='block'; } //dunction that stops the showing of the buttons function btn_noshow(){ document.getElementById('left').style.display='none'; document.getElementById('right').style.display='none'; } //output images document.write('<img id="images" src="' + imageArray[0] + '">'); </script> <!-- left button --> <div id="left" onclick="image(0)" class="left_right"><img src="left.png"></div> <!-- right button --> <div id="right" onclick="image(1)" class="left_right" style="margin-left: 534px; position: absolute; display: none;"><img src="right.png"></div> </div> <center><p style="font-size: 18px;color: #333;font-weight: bold;" id="num_img"></p></center> <center><span class="myButton" onclick="image(0)">Back</span> <span class="myButton" onclick="image(1)">Next</span></center> </body></html> |
And add such code to style.css
|
1
2
3
4
5
6
7
8
9
10
11
12
13
14
15
16
17
18
19
20
21
22
23
24
25
26
27
28
29
30
31
32
33
34
35
36
37
38
39
40
41
42
43
44
45
46
47
48
49
50
51
52
53
54
|
.myButton {-moz-box-shadow:inset 0px 1px 0px 0px #54a3f7;-webkit-box-shadow:inset 0px 1px 0px 0px #54a3f7;box-shadow:inset 0px 1px 0px 0px #54a3f7;background:-webkit-gradient(linear, left top, left bottom, color-stop(0.05, #007dc1), color-stop(1, #0061a7));background:-moz-linear-gradient(top, #007dc1 5%, #0061a7 100%);background:-webkit-linear-gradient(top, #007dc1 5%, #0061a7 100%);background:-o-linear-gradient(top, #007dc1 5%, #0061a7 100%);background:-ms-linear-gradient(top, #007dc1 5%, #0061a7 100%);background:linear-gradient(to bottom, #007dc1 5%, #0061a7 100%);filter:progid:DXImageTransform.Microsoft.gradient(startColorstr='#007dc1', endColorstr='#0061a7',GradientType=0);background-color:#007dc1;-moz-border-radius:3px;-webkit-border-radius:3px;border-radius:3px;border:1px solid #124d77;display:inline-block;cursor:pointer;color:#ffffff;font-family:arial;font-size:13px;padding:6px 24px;text-decoration:none;text-shadow:0px 1px 0px #154682;}.myButton:hover { background:-webkit-gradient(linear, left top, left bottom, color-stop(0.05, #0061a7), color-stop(1, #007dc1)); background:-moz-linear-gradient(top, #0061a7 5%, #007dc1 100%); background:-webkit-linear-gradient(top, #0061a7 5%, #007dc1 100%); background:-o-linear-gradient(top, #0061a7 5%, #007dc1 100%); background:-ms-linear-gradient(top, #0061a7 5%, #007dc1 100%); background:linear-gradient(to bottom, #0061a7 5%, #007dc1 100%); filter:progid:DXImageTransform.Microsoft.gradient(startColorstr='#0061a7', endColorstr='#007dc1',GradientType=0); background-color:#0061a7;}.myButton:active { position:relative; top:1px;}.wrapper{ width: 640px; height: 480px; margin: 10px auto; } .left_right{ position: absolute; display: none; cursor: pointer; margin: -288px 0 0 10px;} |
Now try to follow the gallery link:
Here’s what you should see:
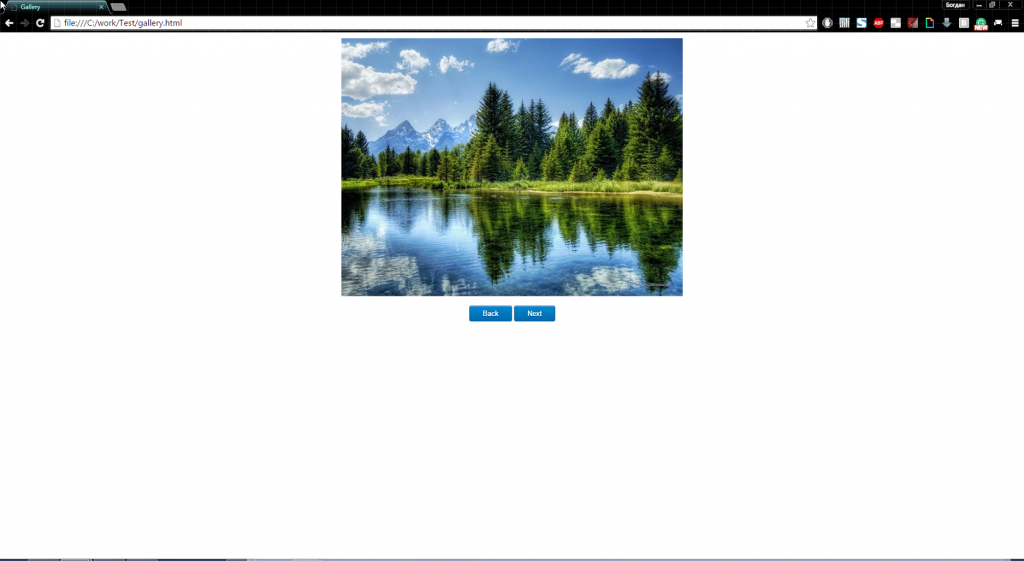
The customer can click buttons to flip the image. Now let’s take a closer look at the code:
imageArray – array that contains links to images. To add, remove, reorder, and so on and so forth, it is sufficient to change the array.
number – a variable that is responsible for the number of the current image.
image (num) – function that takes a numeric parameter, and is responsible for flipping images (left, right), that is:
image (1) – display the next picture due to increment (increase by one) variable number
If you pass any other parameter other than 1, the previous picture will appear.
btn_show – function that shows the arrow when you hover over an image – an event onMouseOver.
btn_noshow – function that stops the display of pictures and called event onMouseOut, when we remove the mouse from the picture area.
Also, in two (2) aforementioned functions, before the screening of the arrows, the number of the current image is checked, in order to skip the left arrow key if it’s the first image and skip the right arrow, if it is the last picture.
There are also comments in the provided code so you can easily change some specifications of the presented gallery.
The archive with this simple website is attached to the tutorial. Thank you for the attention!
For every student, we offer sample on how to make a website using HTML CSS and JavaScript. A main idea of our example will help students to deal with their own assignments. Consider getting help from gpafix.com if you don’t know what to do with your homework. Our experts are ready to help you with different disciplines. Use our help if you are a busy student and don’t have time to handle your homework. Place an order on our site and include your requirements with a deadline. We are available 24/7 for your convenience. Leave your assignment problems to us and we will do everything to satisfy your academic needs.


